January 26, 2026
How To Customize Your App With OneMobile’s Drag-n-Drop Editor?
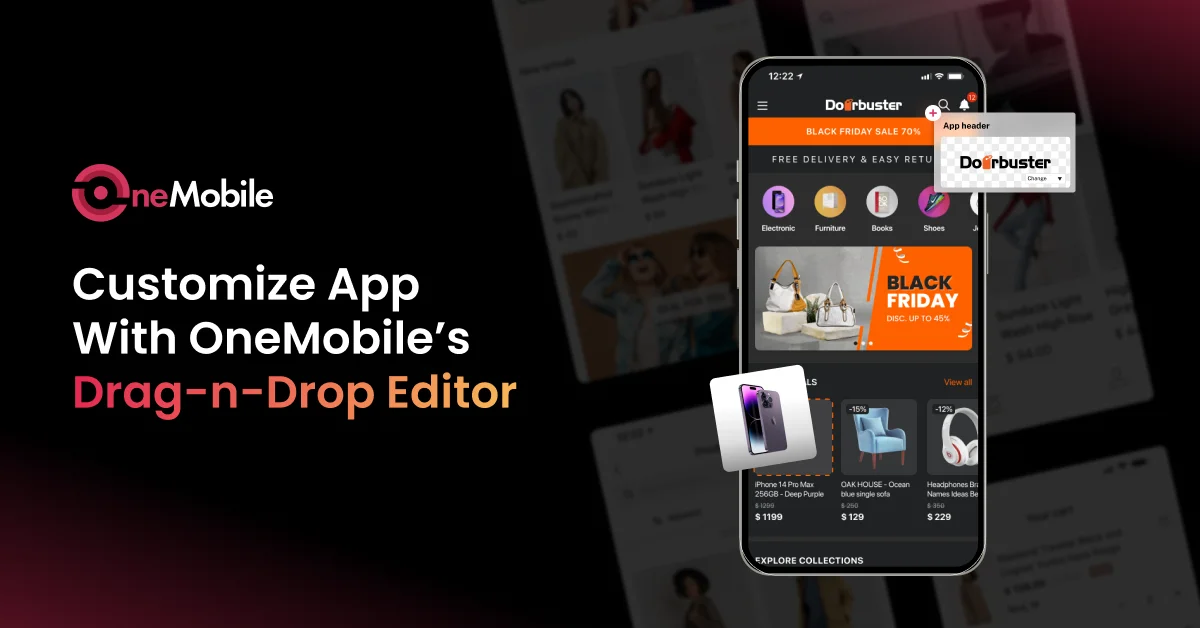
Now that you’ve chosen a OneMobile theme, the next thing to do is customize the theme to your brand style. With our intuitive user interface and drag-and-drop editor, you can effortlessly enhance your app’s visual appeal. A sneak peek of what we’ll cover today:
- Step 1: Getting Familiar with OneMobile’s Design Editor
- Step 2: Optimize your Navigation
- Step 3: Add your Branding
Step 1: Customize your app screens
If you’re familiar with the Shopify theme editor interface, you’ll find that the OneMobile app’s customization interface is very easy to use. Specifically, OneMobile’s theme editor consists of two core components: Screen and Blocks.
1. Choose a screen you want to customize
To get started, you need to select a screen to customize. To do so, navigate to the top middle of your screen and click on the drop-down menu. 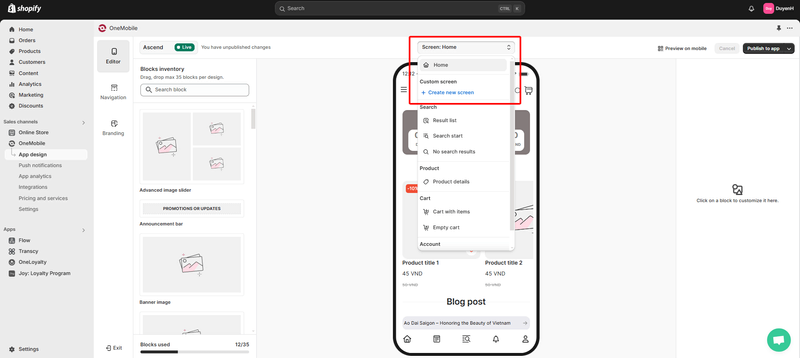 As the menu collapses, you can choose a screen to customize, including:
- Home screen: Access the main features, view promotional content, and navigate to different sections from the central hub of your app.
- Search screen: Help users quickly find what they’re looking for with smart, intuitive search flows.
- Product details screen: Offers in-depth information about a specific product, including descriptions, prices, and images, with options to add the product to the cart.
- Cart screen: Let users easily manage and review their selections before purchase.
- Account screen: Allow users to view and manage personal account details, order history, preferences, and settings related to their profile within the app.
Moreover, if you’re using the Growth plan or higher, you can also add custom screens to your app. For instance, you can add a custom screen feature like deals, BFCM, or an exclusive collection.
2. Drag and drop blocks to your screen
After selecting a screen to customize, let’s drag and drop our ready-made blocks (design elements) from the left sidebar onto any screen. OneMobile provides 35 blocks. For example, here are some of the outstanding blocks we offer:
- Product recommendations: These blocks filter popular products from the store’s product information to recommend them to customers, personalizing the user experience.
- Event countdown timer: With the countdown timer block, you can create urgency and boost engagement, promoting quick user actions and highlighting limited-time offers to improve conversions.
- Video blocks: Want to ‘steal’ the TikTok Shop’s video commerce for your app? If so, our team has video blocks, which enhance user engagement and boost sales by providing dynamic, interactive product demonstrations.
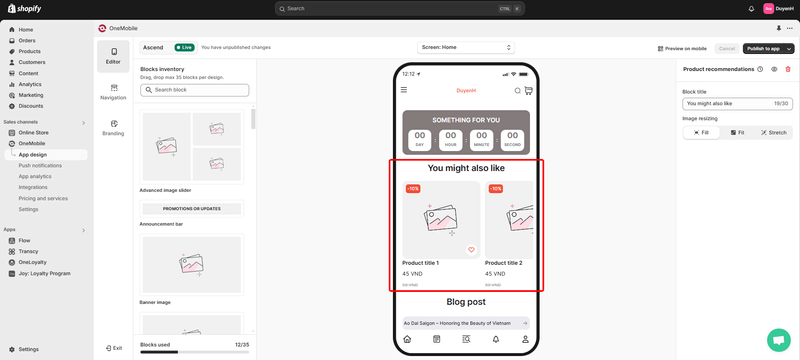 What sets OneMobile apart is our ability to enable full customization of your blocks. For example, you can add text, change images, adjust padding, and much more. This flexibility allows you to tailor your app’s appearance and functionality to perfectly match your brand and user needs.
Step 2: Optimize your navigation
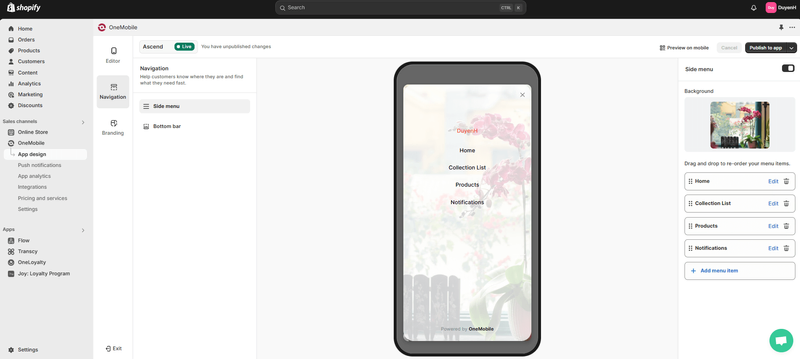
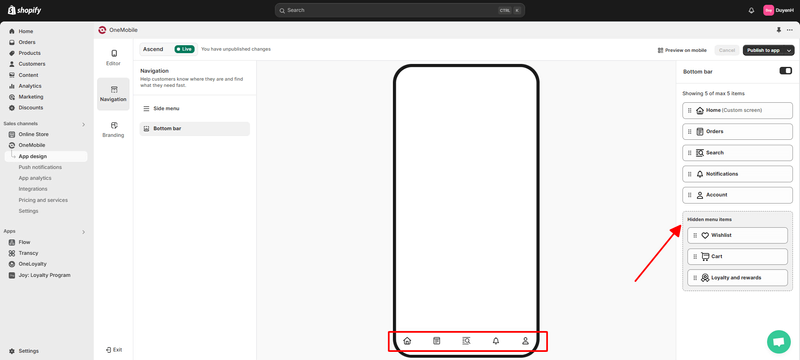
After customizing all screens, the next thing to do is optimize your mobile app’s navigation. Optimizing navigation helps customers find information quickly, enhances user experience, and boosts sales. With OneMobile, you can add navigation both in the side menu and the bottom bar.
- Side Menu: A collapsible menu on the screen’s side that displays options in a list format. You can drag and drop to reorder your menu items and upload an image for the sidebar background.
- Bottom Bar: A bar at the screen’s bottom with quick-access icons and labels. You can change the pages you want to display by dragging and dropping, with a maximum of 5 pages shown.
Step 3: Add your branding
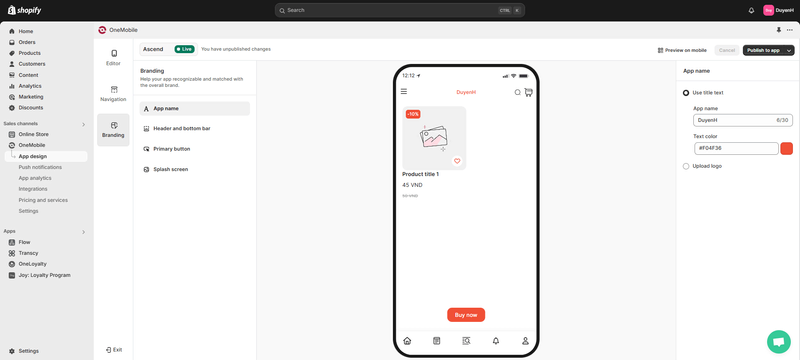
And last but not least, an important step to complete your mobile app is finalizing the Branding section. Our team lets you customize according to your preferences and showcase your brand with assets such as:
- App name: Display your brand name on the header with two options, title or logo.
- Header and bottom bar: Personalize your app’s look by selecting custom colors for the background and icons of both the header and bottom navigation bars.
- Primary button: During this phase, you can customize your color’s button, ensuring it aligns perfectly with your brand’s visual identity and catches users’ attention
- Splash screen: We offer two image upload options: app logo and full-screen image *A splash screen is a welcoming image that appears when you first open an app or program while the app loads in the background.
Conclusion
With the tools our team has introduced, you’ll easily refine your mobile app to enhance your brand, improve navigation, and effectively attract customers. We believe that with these guides, you’ll confidently create a mobile app without spending too much time on research.
Table of Contents
Table of Contents
Read more articles
9 Mobile Commerce App Trends To Hop On
By OneMobile Team
January 26, 2026
AI Campaigns: Transform Your App for Holiday Sales in Clicks
By OneMobile Team
January 26, 2026
