💡 TL; DR: Steps to create a Google Play Developer Account
|
After building a mobile app with OneMobile, you will need a Google Play Developer Account to publish your Android app on the Play Store. If you’re wondering how to get started, you’re in the right place.
In this guide, we’ll walk you through how to create a Google Play developer account from start to finish. We’ll cover what you need before you begin, provide a step-by-step signup tutorial, and share post-registration tips.
By the end, you’ll be ready to sign up for a Google Play developer account with confidence and move on to publishing your Android app.
What to prepare before creating a Google Play developer account?
Before you begin the Google Play developer account sign-up process, make sure you have the following prepared:
| Google Account | You will need an active Gmail account (ending with @gmail.com) to register. If you don’t have one, then set up a new Google account. |
| 2-Step Verification | Google requires 2-step verification for enhanced sign-in security. To create a developer account, make sure that you turn on 2-step verification for your Gmail account. |
| Payment Method | As of September 29, 2025, you will be required to pay a one-time registration fee of $25 per Google Play Developer Account, and it’s essential to have an accepted payment method. |
After these prerequisites are met, let’s proceed with creating a Developer account.
How to create a Play Store Developer account?
Now, let’s go through the Google Play developer sign-up process step by step.
Step 1: Choose account type
Using your prepared Google account, navigate to the Google Play Console sign-up page. Log in with your Google credentials. If prompted, complete the 2-Step Verification to confirm it’s you signing in.
The first decision is selecting your account type. You will see an option to register as an Individual (Personal) or an Organization (Business) account. Select the option that best suits your situation. Then, click “Get started” under the chosen category to proceed.
💡 FYI:
| Account type | When to choose |
| Individual (Personal) | If you’re a student, hobbyist, or amateur developer and want your app to appear under your personal name. |
| Organization (Business) | If you’re registering on behalf of a business or organization that is engaged in commercial, industrial, professional, or governmental activities. |

Step 2: Review account creation requirements
Before proceeding, make sure you meet all the prerequisites for your chosen account type. Google will present a list of requirements for you to review carefully. Ensure you have all this information prepared before proceeding to the next step.
| Account type | What you’ll need |
| Individual (Personal) |
|
| Organization (Business) |
|

If you selected an Organization account, ensure you have the authority to create the account on behalf of your organization and to accept Google’s terms for your company.

This step is mandatory. You must have full authority as listed to meet the requirements for creating a developer account. You cannot proceed without meeting the developer’s requirements.
Step 3: Create a developer name
This name will be displayed on the Play Store as the publisher of your apps. It can be your own name or a brand name, and it doesn’t have to match your legal name.

Step 4: Link a payment profile
Next, Google will prompt you to link a Google Payments Profile to your Play Developer account. This profile is your financial identity within Google’s system. It stores your legal name, address, and payment details, and is used for two main purposes: verifying your identity and handling transactions.
Example:
- If you register as an individual, your payment profile might include: Name: John Smith Address: 123 Main Street, Los Angeles, CA Payment method: Visa ending in 1234
- If you register as an organization, your payment profile might include: Business name: BrightTech LLC Business address: 456 Market Street, San Francisco, CA Payment method: Company credit card

You can select an existing payment profile associated with your Google account or create a new one.

This profile carries your legal name and address and will be used to verify your identity.

If you chose an Organization account, you will also be asked at this stage to enter your organization’s D-U-N-S number to confirm your business details.

Make sure the legal name and address in the payments profile match your actual information (or your company’s information) because Google will later require identity verification based on these details.
Step 5: Confirm your public developer profile
Google will now display the information that will appear on your public developer profile on Google Play. This typically includes your legal name, your country, and a developer email address for public contact. Verify that these details are correct, and then check the box to consent to making this developer profile information public.

Step 6: Share your experience with Android and the Play Console
Google wants to know more about your background with Android and the Play Console. You may be asked if you’ve used the Play Console before, how many apps you’ve developed, and your level of experience in app development.

Step 7: Provide planned apps and monetization details
In this step, outline your plans for the Google Play Store. You’ll specify approximately how many apps you intend to publish on Google Play in the next 12 months and indicate whether you plan to earn money from your app or not. Additionally, select the general categories that best describe the type of apps you will be publishing.

Step 8: Provide contact information for Google
Please provide the contact details that Google can use to reach you regarding your developer account. This includes the contact’s name, email address, phone number, and your preferred language for communication.

Step 9: Accept terms and initiate account creation
Before your account can be created, you must accept Google’s legal agreements. Take a moment to review the Google Play Developer Distribution Agreement and the Google Play Console Terms of Service. Then click the “Create account and pay” button to proceed.

Step 10: Complete Your Purchase
The final step is to pay the $25 developer registration fee. A secure payment window will appear where you can enter your credit or debit card details to complete the purchase.

Add your payment information and confirm the payment.

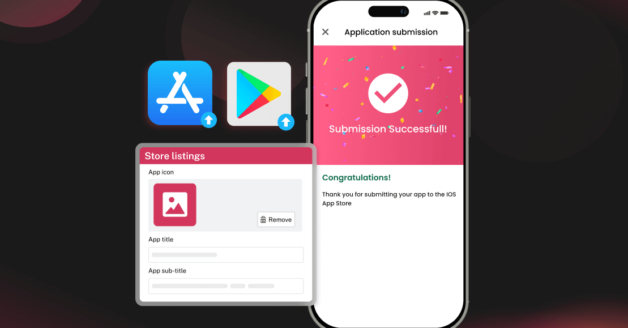
Once your payment is successful, your Google Play Developer account will be created. You should see a confirmation message appear, stating that your account has been created. You can then click “Go to Play Console” to access your new developer account.
Tips and best practices for a successful Google Play Store account creation?
Creating the account is just the beginning. To make the most of your Google Play developer account and avoid common pitfalls, keep these tips in mind:
- Prioritize security: Enable 2-Step Verification, use a strong password, and manage access through user permissions instead of sharing your login.
- Keep information consistent and up-to-date: Ensure your developer profile (including name, email, and address) is accurate. Google may occasionally verify that your account’s contact information is active by sending emails or making calls to you.
- Don’t hesitate to use Google’s support: The Play Console Help Center and Developer Support are your go-to resources for troubleshooting and verification guidance.
- Prepare for publishing: Have your app assets, description, privacy policy, and testing plan ready before launch to avoid delays.
- Be mindful of Google Play policies: Stay informed about Google Play’s rules and policy updates to keep your apps compliant.
- Leverage console tools: Explore features such as Android Vitals, pre-launch reports, and store listing experiments to enhance quality and visibility.
Conclusion
Setting up a Google Play Store developer account is the first big step to bringing your Android app to life. You’ve learned how to create a Google Play developer account by preparing the proper prerequisites, following the step-by-step registration on the Play Console, and completing Google’s verification requirements. Once your account is approved, you have the keys to another exciting milestone of building your brand’s presence on the Play Store.
Frequently asked questions
Can you publish your Android app to the Google Play Store without a Google Developer Account?
Yes, if you choose to build your app through OneMobile, then you can publish your Android app using our Shared Developer Account. However, for complete control, we still highly recommend creating your own.
Is Google Play free for developers?
No, Google Play isn’t entirely free for developers. To publish apps on the Play Store, you’ll need to pay a one-time registration fee of $25 USD for a Google Play Developer account.
Is a Google Developer Account worth it?
Absolutely. For a one-time $25 fee, a Google Play Developer Account gives you access to billions of Android users, powerful app management tools, and monetization options. It’s a small investment with considerable potential for anyone serious about app development.
How long does it take to create a Google developer account?
It only takes a few minutes to fill out the forms and pay the registration fee. Once you’ve submitted your info, Google usually activates your developer account within 24 to 48 hours.

Alexandre Le
Content Specialist
“I'm Alexandre Le - a marketer with 5+ years of hands-on experience in the eCommerce industry. I want to use my expertise and personal perspectives to produce insightful blog posts that help online store owners to launch, run, and scale up their businesses successfully.”
Table of Contents
Table of Contents
Read more articles
How To Publish an App With OneMobile: 5 Easy Steps
By OneMobile Team
January 26, 2026
How To Prepare Your Mobile App for BFCM
By OneMobile Team
January 26, 2026